This essential guide details how to enable and configure macOS firewall using Intune. For Macs already enrolled in Intune, you can utilize endpoint security policies to adjust built-in firewall settings efficiently.
If your organization has never configured the macOS firewall, and you plan to use Intune to do so, there are two methods you can use:
- An endpoint security to configure macOS firewall security.
- A device configuration profile to enable macOS firewall and manage individual firewall settings.
The Endpoint Security Firewall policy in Intune is essential for managing firewall settings on your macOS devices. Fortunately, Microsoft allows the use of this policy for both Windows and macOS platforms.
Prerequisites
The following are the prerequisites to enable and configure settings for the built-in firewall on macOS using Intune:
- To begin, Mac devices must be enrolled in Microsoft Intune, as this is a crucial prerequisite.
- Devices should be running macOS 13 or later. However, you must always use the latest version supported by macOS.
- To manage endpoint security policies, you’ll need a user account with the appropriate permissions. A global administrator account will work, but you can also set up an account with the necessary RBAC permissions.
List of macOS Firewall settings in Intune
You can do more than just enable the firewall with macOS endpoint protection settings in Intune. Here are some settings that you can configure:
- Enable or disable firewall: You can control whether you want the firewall to be turned on (default) or turned off.
- Activate Stealth Mode: Increases your macOS device security by telling them not to respond to the probe requests sent over in the network by security tools.
- Firewall Logging: You can configure your macOS firewall to log the activities.
- Control connections per application: This makes it easier to get the benefits of firewall protection and prevents undesirable apps from taking control of network ports.
- Block all incoming connections: This blocks all sharing services and all incoming connections except those required for basic internet services. For example, DHCP, Bonjour, and IPSec are some important connections that shouldn’t be blocked.
- Configure which apps can receive incoming connections: You can add apps by bundle ID or use the Intune admin center for apps added to Intune.
- Specify how long to keep security associations: You can specify a time in seconds between 300, and 3600 for how long to keep security associations after network traffic isn’t seen.
- Applications blocking: Prevent your users from downloading and installing apps from the app store.
Keep in mind that it is not mandatory that you require all the settings to be used. You must configure the ones that you really need for your organization.
Enable and Configure macOS Firewall using Intune
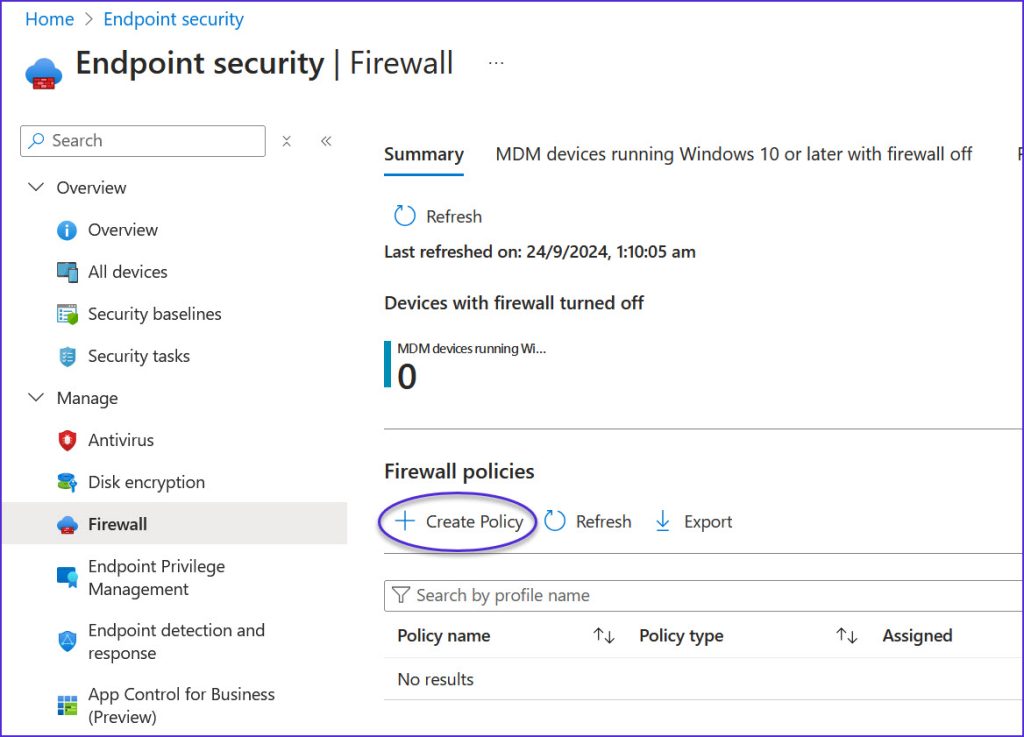
To enable and configure the firewall for macOS devices using Microsoft Intune, you can use the Endpoint Security Firewall policy. Launch the Intune admin center and go to Manage in the Endpoint security node. Under Manage, select the Firewall section and under Firewall Policies, click on Create Policy.
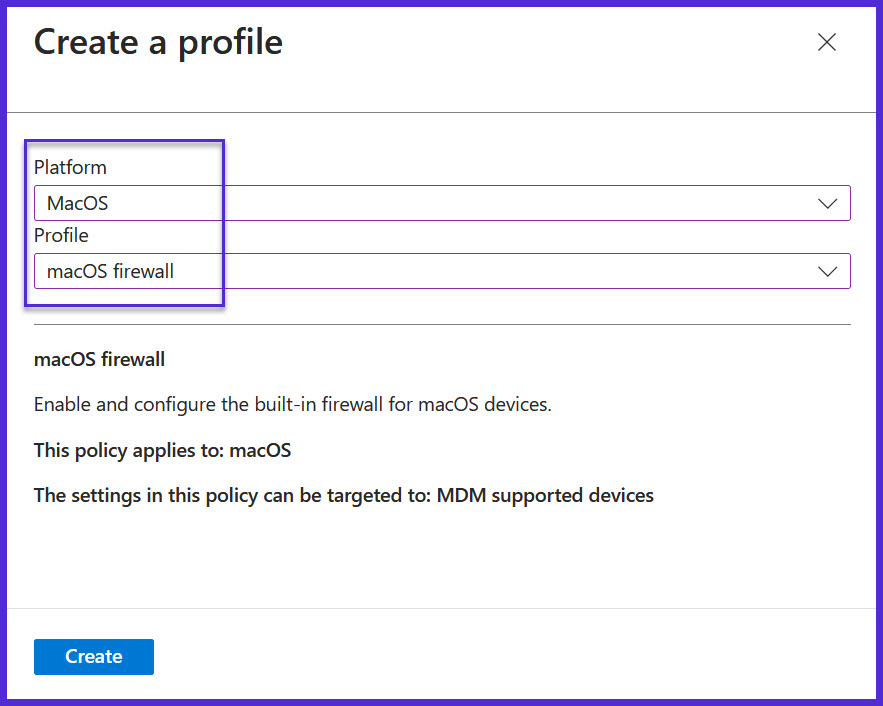
Choose macOS as the platform and macOS Firewall as the profile and hit the Create button. Intune clearly specifies that you can target this policy to only MDM supported devices.
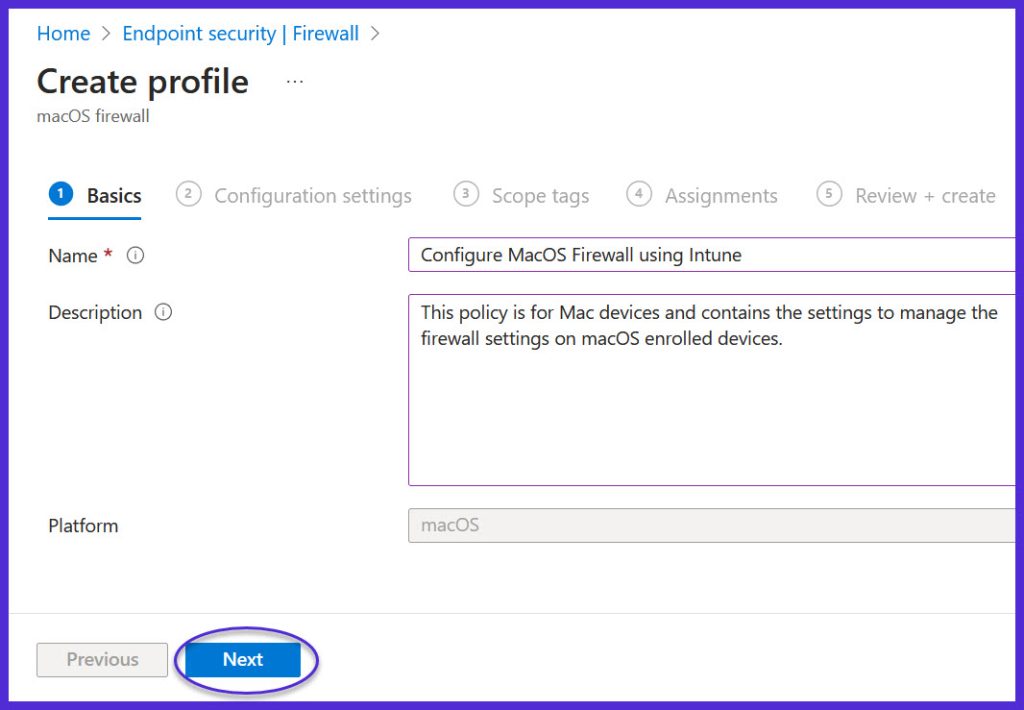
Enter the policy name and description. The platform is set to macOS by default. Click Next.
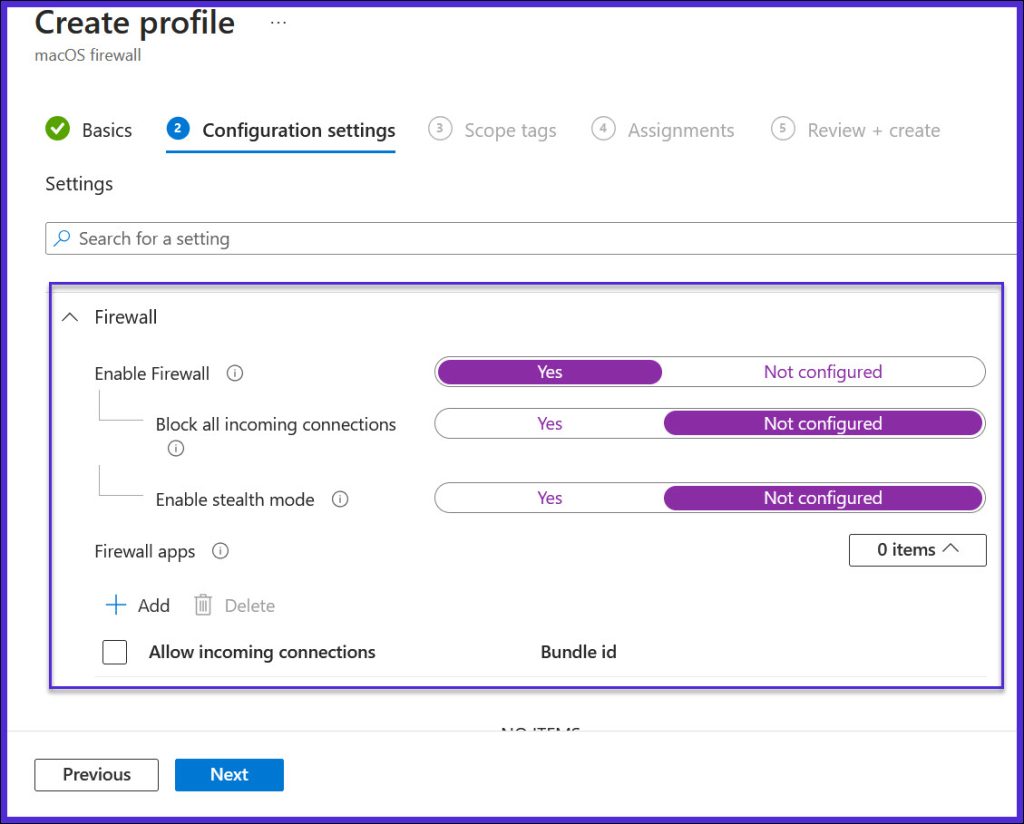
The Configuration Settings tab is where you enable and configure macOS firewall settings in Intune. The firewall needs to be enabled in order to configure any of the settings. Now that makes sense because all the settings rely on the firewall to be functional on Mac.
Most importantly, you must configure the ‘Enable Firewall‘ option first. All you need to do is enable the firewall by moving the slider from Not configured to Yes. This will ensure the other firewall settings are available for configuration.
Once you have enabled the macOS firewall, you can choose to block all incoming connections, enable stealth mode, or leave it disabled. Additionally, you may configure the firewall apps option and choose to allow or block the apps for your Mac users.
Don’t panic if you miss configuring few of the firewall settings here. You can change it later by editing the macOS firewall policy in the Intune admin center. When you’re done with configuring the built-in firewall settings for Mac, click the Next button.
You’ll notice that the default scope tag is automatically added to the firewall policy. You may define your own for your organization and use them here. Scope tags are optional so we’ll skip them here and move to the next step.
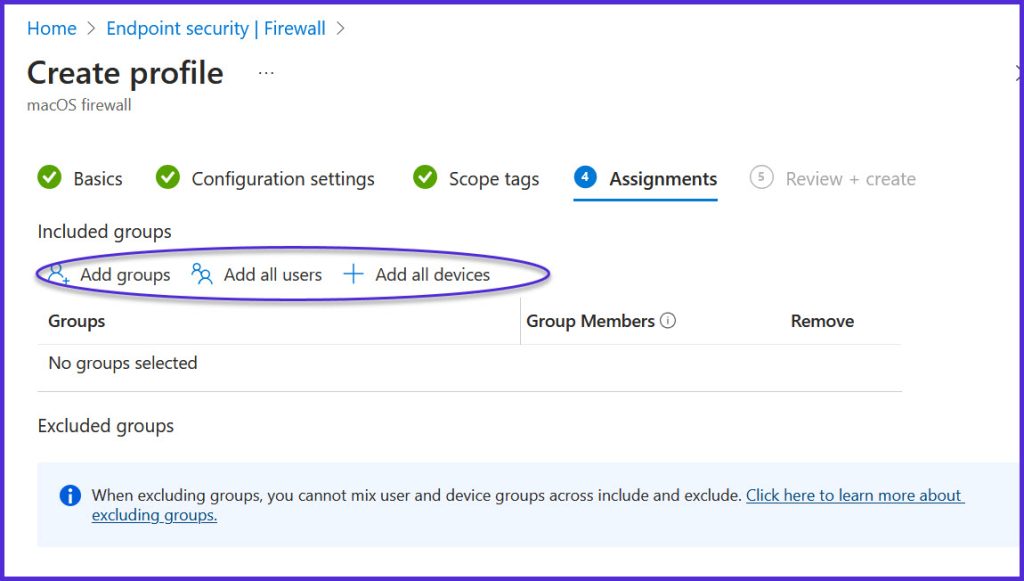
On the Assignments tab, add your device groups or user groups that you intend to apply the macOS firewall policy settings.
This is the last step where you see a summary of the firewall settings that you’ve configured for your Mac devices. Review them thoroughly and click on the Create button.

A new macOS firewall policy is created and Intune should notify you about this by displaying a notification. This new policy is displayed under the firewall policies.
Speed up policy retrieval on Mac devices
After you have applied the Intune macOS firewall policy, all you have to do is wait and let your Mac devices sync with Intune to retrieve the latest policies. If you wish to speed up the policy checks, you can manually sync the policy from the company on Mac.
Monitoring the macOS Firewall Policy
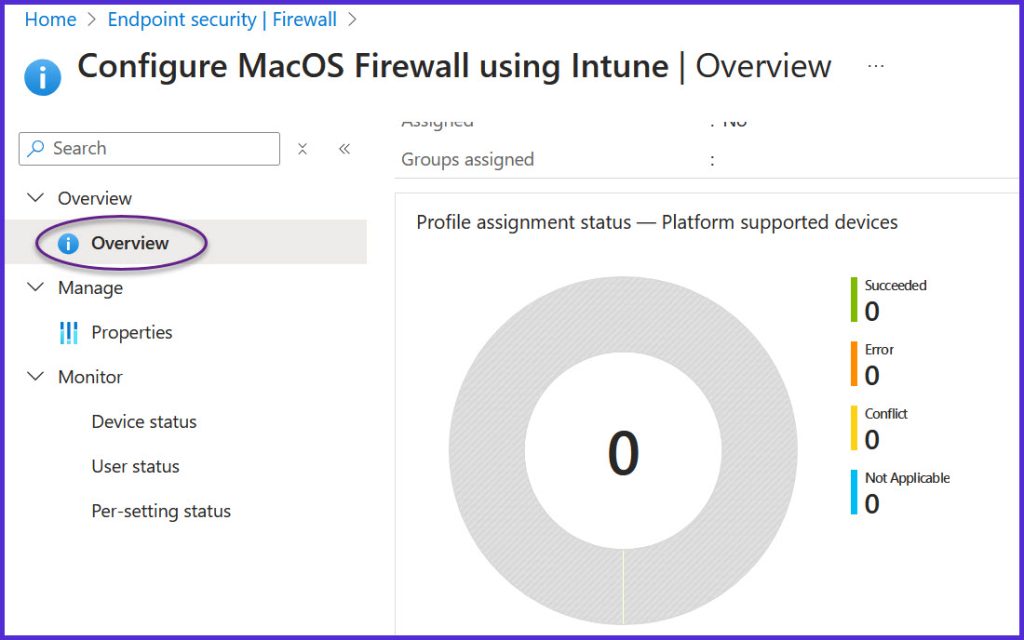
Once you’ve assigned the firewall policy to your Mac groups, choose the macOS firewall security policy and click the View Report button to check how many devices have received the firewall settings.
The stats here are updated only when the Mac devices send out the firewall configuration information to Intune. You should be patient here because it may take a significant amount of time to see the total Mac devices that have received the firewall policy settings.
Verify Firewall Settings
Once your Mac device(s) get the latest policies from Intune, the firewall is turned on and the other settings you’ve configured in the policy are applied appropriately. To verify if the firewall is enabled and other settings are in-force, sign in to one of the Macs. Go to Settings > Privacy & Security > Network > Firewall. Now click on the options tab to verify the firewall configuration applied via Intune policy.
You should also find a new com.apple.security.firewall profile on your Mac device under Profiles, indicating that it has been applied through Intune policy. The user can no longer modify any of the firewall settings that you have applied using Intune. If a firewall is causing problems at work for a user, the user must contact the Intune administrator as to exclude the Mac device from the policy.